If there’s one thing that makes a garden more exciting, it’s a centerpiece. A centerpiece, or focal point, is important to have in a garden because it captures the attention of the beholder and makes the surrounding landscape seem more interesting and teeming with life.
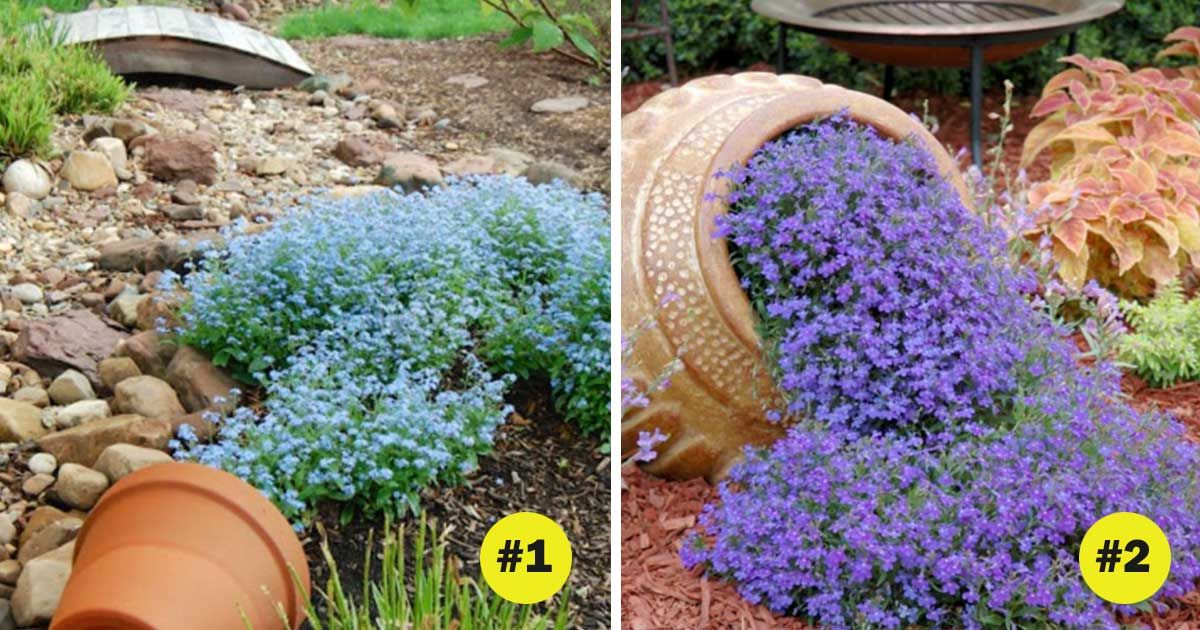
A spilled flower pot is an easy centerpiece idea that you can create today. It adds character to a garden landscape with its waterfall look. To make a spilled flower pot, you will need to first pick the perfect spot in your garden. Once, you’ve selected the perfect place for your spilled flower pot, you will need to gather your materials. You will need flowers, a pot and some soil or compost.
Planting your spilled flower pot
To create your spilled flower pot centerpiece, dig a hole in your desired location. Next, put the flower pot in the hole and fill it in with potting soil and five to six plants.
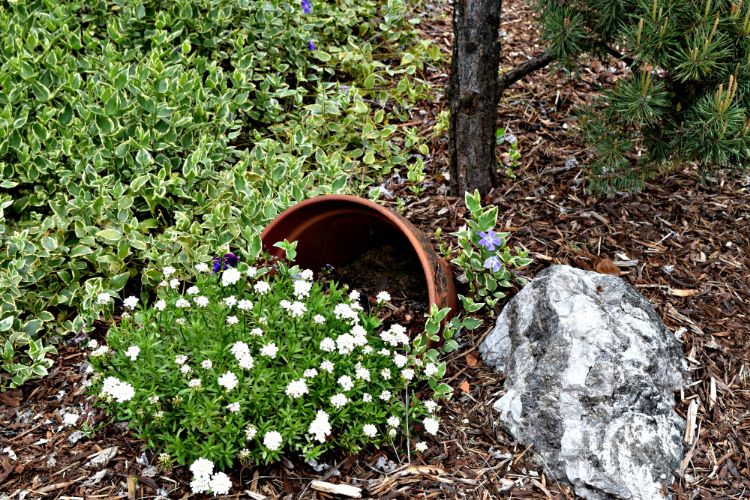
A great use for a broken pot
According to Balcony Garden Web, a round or circular-shaped pot is perfect for a spilled flower pot. This project is a great way to make use of a broken flower pot. If you use a broken pot, make sure the broken part is fully covered by the soil.
Warm and cool color flowers work best
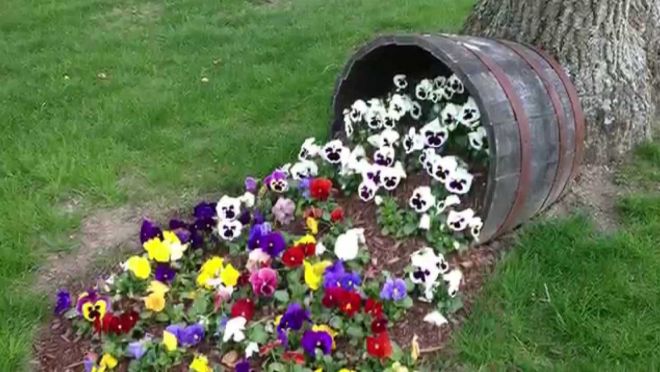
For the flowers, Balcony Garden Web recommends using warm colors like red, yellow, orange as they are attention grabbing colors. As far as specific plant types are concerned, Interiorholic suggests sticking to geraniums, lobelias, petunias, alyssum, daisies, and begonias as they are cascading flowers.
Use up leftover plants
You can go buy flowers specifically for this project or, as Interiorholic recommends, you can use up plants you have left over from other gardening projects. Though Balcony Garden Web recommends using warm colors for the spilled flower pot, cool colors such as blue and purple work equally well. Succulents are also a great choice according to Interiorholic.
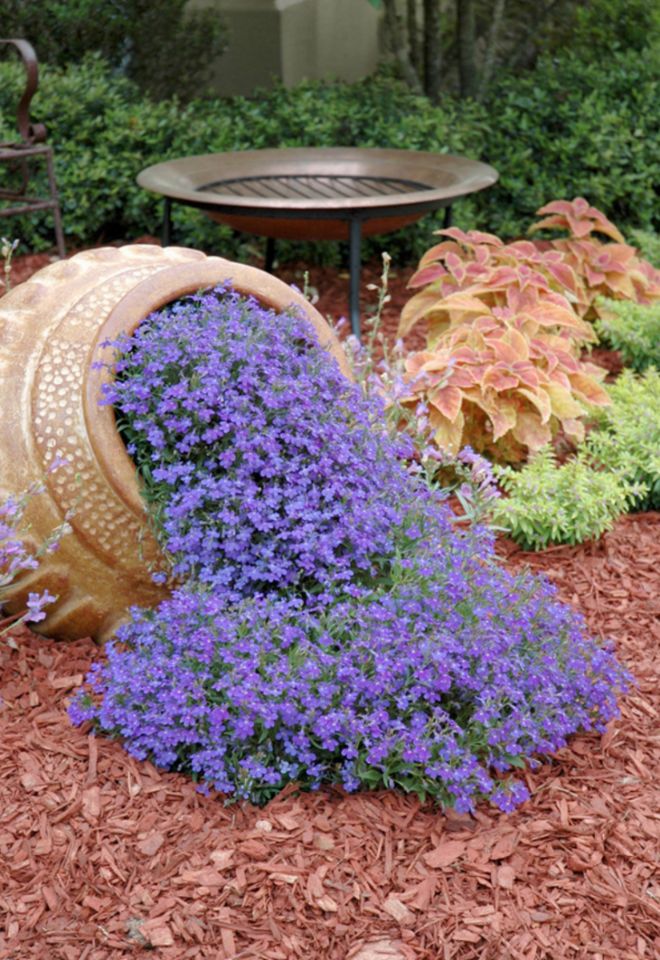
How to create the spilling effect
Today’s Homeowner suggests placing a couple of plants inside the rim of the pot, so that the plants appear to be spilling out.
Care for them as with other annuals
According to Today’s Homeowner, you should care for the plants in your spilled flower pot as you would with any other annuals by watering them and using a fertilizer occasionally.
If you love the idea of a spilled puddle of flowers, be sure to SHARE this with your friends!
Succulents are the hot-houseplant of the moment. These petite and pretty plants are adored for their cartoon-like shape, variety of colors, and their ease to care for.
These plants are perfect accents for your desk, dining room table, or your outdoor table set this summer. We’ve seen succulents displayed in pretty little pots all over the web, but there’s more creative ways to show them off and we’ve gathered some of the easiest, and cutest DIY’s out there.
1. Succulent lantern
Have an old lantern lying around? One with already broken glass, or maybe a busted door? This it the perfect DIY to upscale it.
This craft idea by Fun Farm Living is going to add a chic, and funky vibe to your home – plus, it’s fun and easy to put together. Use it as an accent on your outdoor dining set, place it on the front steps, or even a window of your home.
2. Driftwood succulent planter
This is the DIY all the upscale design shops don’t want you to know. You’ve probably seen this stunning centerpiece grace magazines and high end design websites – but now you can make it yourself.
In an E-how post, Lucy Akins has put together a simple DIY so you can create it at a fraction of the price.
3. Chair succulent garden
We all have an old chair that we don’t really know what to do with. Maybe it doesn’t match your set, or you picked it up on the side of the road because it was too pretty to pass up. Either way, it’s sitting around collecting dust.
Your Great Finds has an incredible DIY that’s going to help you transform that chair into a beautiful addition to your garden or patio.
4. Hanging succulent ball
These succulent balls are a versatile craft you can use all over the home. Hang them under the umbrella of your outdoor dining set, outside your front door, and as replacements for holly-balls during the holidays.
It’s a fun and easy DIY put together by Lowe’s that also makes a great present.
5. Vintage tea tin succulent planters
We’ve seen succulents in pretty pots before – but reusing vintage, and modern tea tins is a fun spin on the trend. In this DIY by The Sarah Johnson you’re both upscaling something you’d normally trash, and giving these pretty succulents a cute new planter you can show off around the house.
Ready to get creative with succulents? Share this with friends who would love these DIY’s too on Facebook, Twitter, and Pinterest.
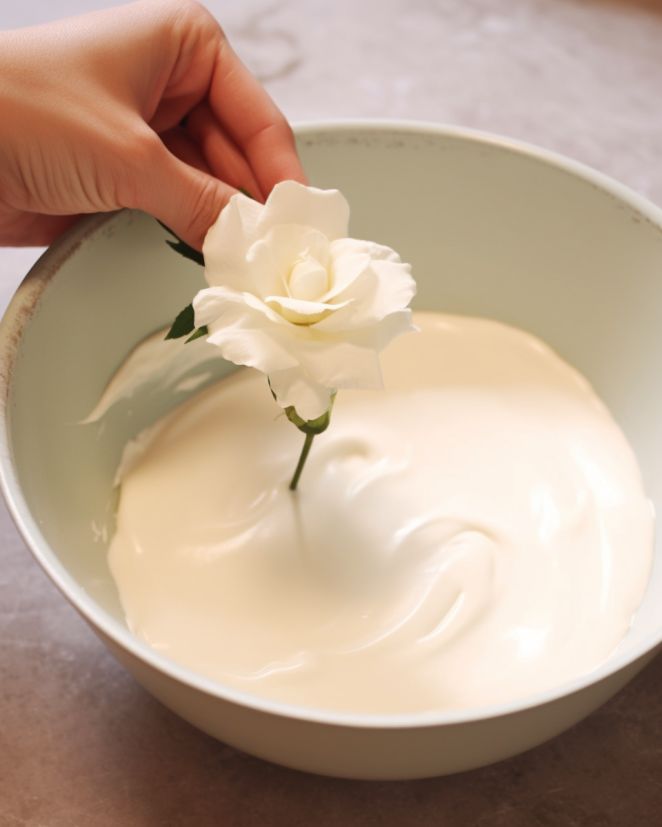
Plaster of Paris is an easy-to-use hardening agent. It’s commonly used in projects like paper-mache and ornamental decorations. One trend that’s blowing up Pinterest is using this plaster to coat flowers and create beautiful decorative floral pieces.
Plastering the flowers is as simple as mixing the plaster, gently coating the flowers and allowing them to dry. The result is surprisingly stunning. Check out how these crafters have taken the trend to the next level.
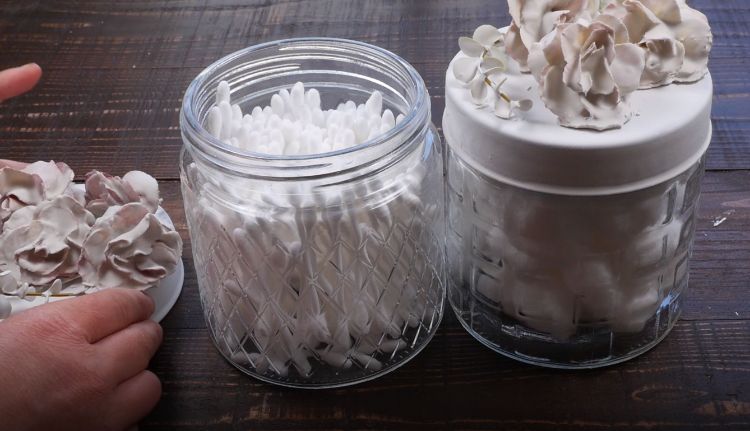
1. Plaster of Paris jars
Add a little pop to your bathroom storage solutions by attaching smaller plaster flowers to the lids of glass jars. Fill the jars with cotton balls or other essentials, and pop the cute lid on top. Feeling more decorative? Fill the jars with colored sand, shells or marbles.
2. Plaster flower candle votive
This stunning project gives you elegant decor that’s pretty and functional. You can even add tint to make the flowers a color that matches your home.
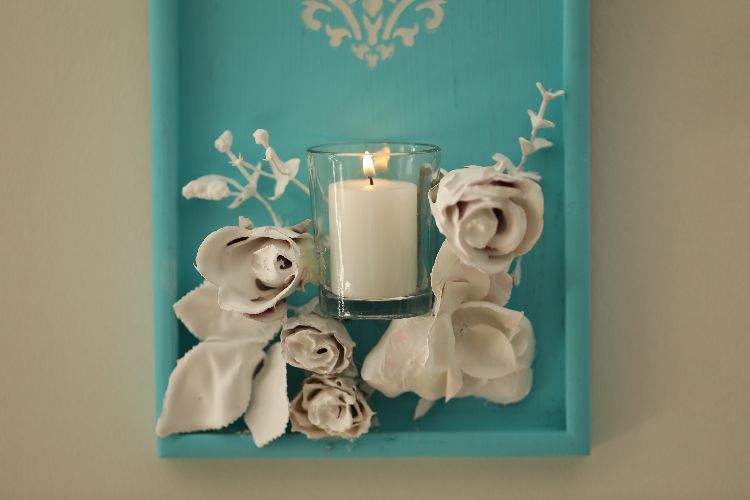
3. Plaster of Paris flower hanging votive
This is a fun twist on the plaster-of-Paris flower trend. Once the flowers have hardened completely, attach the flowers and a small candle to a painted board for a pretty wall decoration.
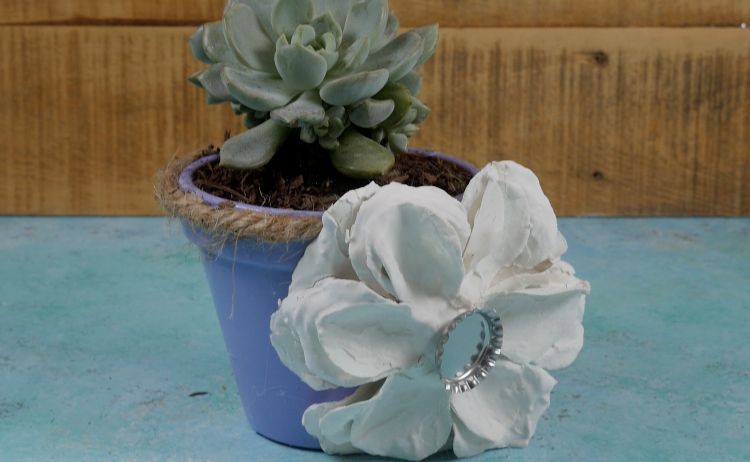
4. Plaster-dipped flowerpot
Give your herbs and spices a makeover with this adorable flower pot idea. After using plaster to coat your flowers, you can attach it to a pot to dress up your favorite plant. Have fun with these by painting the petals or adding jewels or extra pop.
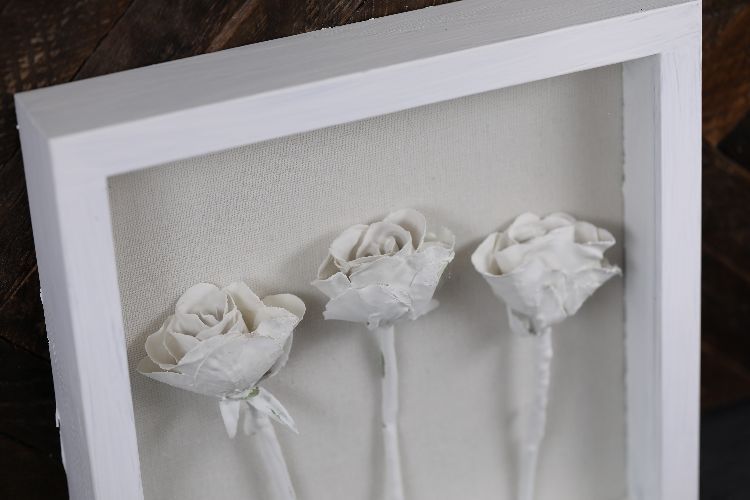
5. Plaster flower picture
Try a more traditional project for your plaster flowers. Choose a frame that’s the same color as the plaster (white if you don’t add tint), add plastered flowers, and hang it on your wall. Use different flowers in each frame for a modern design pop.
6. Pretty plaster garbage can
There’s no need to throw your trash in an ugly bin! Make it pretty by attaching plaster flowers to a wire garbage can. Note: The flowers are heavier in plaster, so you might want to try smaller flowers first. Check out the cute results below: (If you want to be super matchy matchy, we recommend a white wire basket.)
7. Plaster rose sculpture
This project featured below is decidedly elegant! It looks stunning in all white (no tint needed), but you could go a little artsy and tint just a few of the flowers (or all of them).
You know all those banana peels you’ve been throwing away? Well, there are actually some useful ways to reuse those soft shells — and no, we don’t mean for tripping your friends cartoon-style.
If you live in a banana-eating household, you probably throw close to a dozen of these away every couple of weeks. Stop the waste and start using these peels to help boost your garden’s health and nutrients. It’s easy, free and something you do year-round — whether it’s for your veggie garden or house plants.
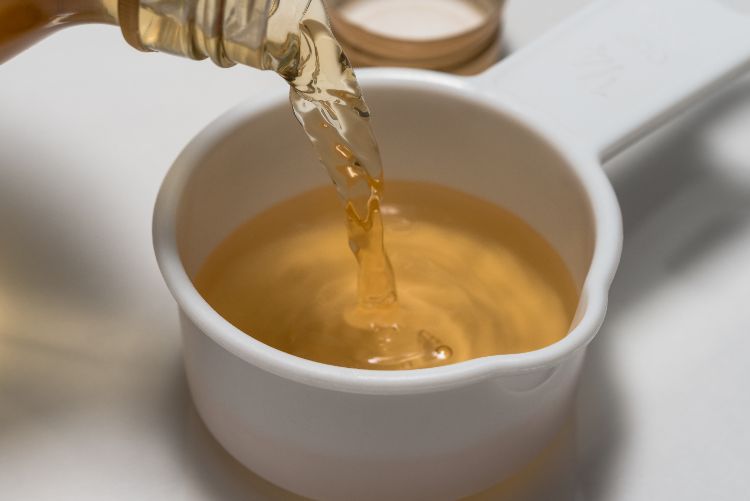
1. Banana peel tea
No, you’re not going to drink this stuff. Instead, you’re going to stick a peel in a jar full of water for two days, and then pour it over your plants. The nutrients from this tea invigorate your plants and give them an added boost.
2. Plant them directly in your garden
Use fresh peels or even the peels from your banana peel tea above for this one. Simply cut up the peel into 1/4-inch pieces and place them either below your plants before you plant them (be sure to stick them far enough down so they don’t get in the way of the roots), or just below the surface.
By cutting up the peel, you start the decomposing process — and as this plant decays, it is going to release some awesome vitamins and nutrients for your new plants.
3. Toss banana peels in the compost
People don’t like to throw out food. Banana peels often spark the idea for a compost pile. Start with your banana peels, and then begin adding all your other scraps to create some super-rich compost.
4. Dry and ground up for fertilizer
Dry out your peels, ground them up and sprinkle this nutrient-rich powder on soil before planting for an added boost of power. The Frugal Chicken has a great tutorial on drying out peels.
5. Simply plant the whole peel
This is probably the most obvious option, and it works well. Dig a trench 4 or more inches deep. Lay your peel out flat, fill it up a bit with dirt and plant your seeds. As your plant’s roots grow and the peel decomposes, the roots will get access to some wonderful nourishment.
6. Fertilizer spray
It’s pretty much a banana peel spray, but with an added kick. Mix up crushed eggshells for a calcium boost and Epsom salt for magnesium in a spray bottle. Use it to give your well-established garden and house plants a vitamin boost.
7. Insect trap
Want to keep pesky bugs out of your garden or off your patio? Soak a cut-up banana peel with apple cider vinegar and place it in a plastic container with holes on top just big enough to let a bug inside. The smell will draw them in and the solution will trap them. It’s a great nontoxic option for both your garden and pets.
8. Banana vinegar
You won’t want to drink it, but your acidic soil-loving plants like blueberries are going to crave this stuff.
The Frugal Chicken explains that you should ferment your bananas in water (full instructions here), and then use the water from the fermenting process on your plants. Let the fermented water sit for four to six weeks so it creates its own vinegar. It’ll give your acid-loving plants a great boost.
Want to know something else? Banana peels are good for around the house too! A few awesome tips from Trash Backwards are:
– Use banana peel to heal a wart; can take just one to two weeks
– Rub the inside of a banana peel on your teeth to whiten them
– Rub the inside of a banana peel on shoes as a shoe polish
– Use the inside of a peel to help heal a bruise
– Banana peels can help heal acne if you rub them on a spot
Did you find this article helpful? Don’t forget to share it with your friends on Facebook, Twitter and Pinterest!
Gardening enthusiasts, sustainability supporters, and DIY project lovers alike, listen up! If you’ve ever faced the problem of keeping your plants watered while on vacation or are simply looking for an efficient way to water them consistently, you’ve stumbled upon a golden solution.
You’ll want to save your plastic bottles for this one. Repurposing a plastic bottle into an automatic vegetable waterer not only conserves water but also makes sure your plants receive the moisture they need at the right time. Let’s dive into why and how this DIY trick works.
Why It Works
Consistent Water Supply:
Plants, especially vegetables, need consistent moisture for optimal growth. An automatic waterer delivers a steady supply of water directly to the roots, ensuring that the plant doesn’t dry out or get waterlogged.
Water Conservation:
Traditional watering methods like sprinklers often lead to a lot of wasted water due to evaporation and runoff. The plastic bottle method targets the root zone, ensuring minimal wastage.
Root Health:
When water is delivered directly to the plant’s root zone, it encourages the roots to grow deeper into the soil, seeking moisture. This strengthens the root system and makes the plant more resilient to drought.
Recycling: This method repurposes plastic bottles, giving them a second life. It reduces the need to purchase special equipment or tools, and it keeps bottles out of landfills.
How It Works
Materials:
Empty plastic bottle (1-2 liters, depending on plant size)
Sharp knife or scissors
Awl or nail (for making small holes)
Water
Optional: A funnel or tube
Steps:
Preparation:
Begin by thoroughly washing the plastic bottle to ensure there are no residues that might harm your plants. Remove any labels.
Bottle Modification:
Using the sharp knife or scissors, cut off the bottom of the bottle. This will be the end that is inserted into the ground.
Hole Creation:
Using an awl or nail, carefully create small holes around the neck and shoulder area of the bottle. These holes will allow water to slowly seep out into the soil. The number and size of the holes will determine the rate at which water seeps out. A good start is 4-6 small holes.
Placement:
Dig a hole next to your vegetable plant, ensuring it’s deep enough for at least ⅔ of the bottle to be buried. The mouth of the bottle (with the holes) should be facing downwards, toward the plant’s roots.
Filling the Bottle:
Fill the bottle with water. If the opening at the top is small, you may find a funnel or tube helpful. Once filled, screw the cap back on. This controls the air flow and thus the rate of water seepage.
Monitor:
For the first few days, monitor the water level in the bottle and the moisture of the soil around the plant. Adjust the number and size of the holes if necessary. If the water is depleting too quickly, you may need fewer or smaller holes. Conversely, if the soil is not moist enough, consider enlarging the holes or adding more.
Refilling:
Simply remove the cap, fill the bottle when needed, and replace the cap. Depending on the plant’s needs and the climate, you may need to refill the bottle every couple of days or once a week.
Planting a plastic bottle in the ground is a simple, eco-friendly, and effective method to keep your vegetable garden well-hydrated. It’s an example of how innovative, sustainable solutions can be found in everyday objects. So, the next time you’re about to toss a plastic bottle into the recycling bin, consider giving it a second life in your garden instead. Your plants will thank you!
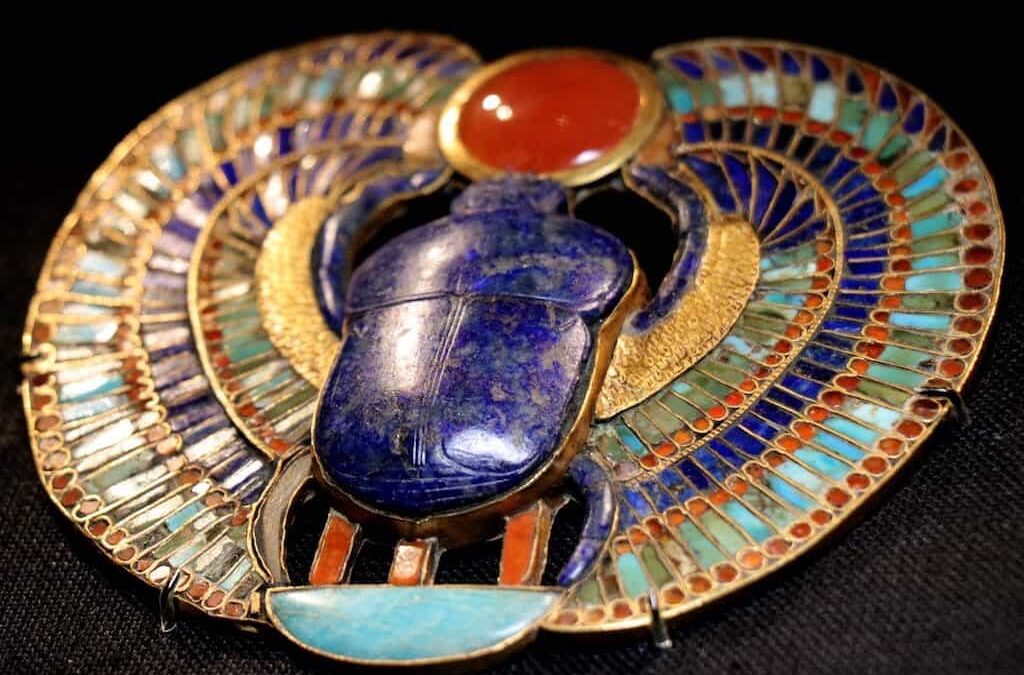
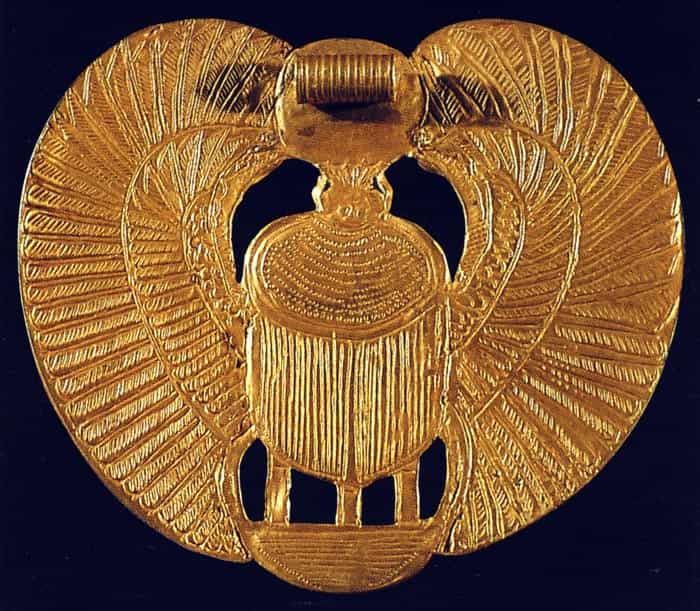
This winged scarab of the famous Egyptian pharaoh Tutankhamun of the Eighteenth Dynasty, found in his tomb by British archaeologist Howard Carter, is a true masterpiece of goldsmithing.
It dates from the fourteenth century BC and measures 9 cm high and 10.5 cm wide.
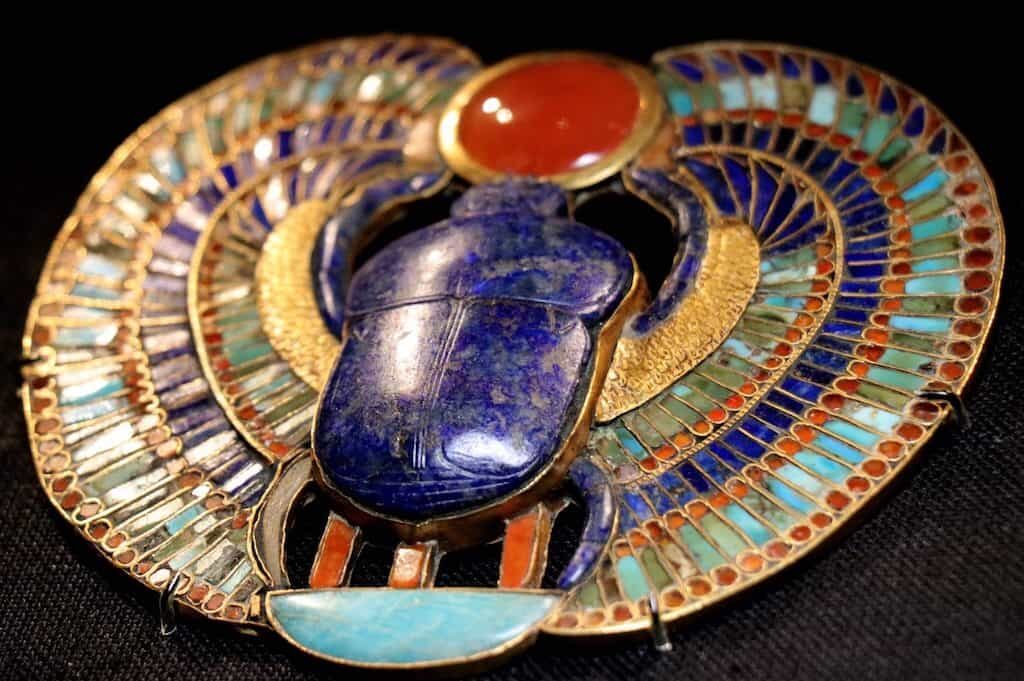
The materials used are mainly gold, lapis lazuli, carnelian, and turquoise. Together, they produce a great chromatic impact, as is the case with his well-known funerary mask.
Represented is one of the most repeated subjects of all the iconography of Ancient Egypt: the dung beetle, which used to be placed under the mummification bandages at the level of the deceased’s heart.
In the case at hand, it did not appear under the bandages but rather in a somewhat jumbled box along with other valuables. Its body is made of deep blue lapis lazuli inlaid with golden pyrite, one of the component materials of this rock.
The beetle’s beautiful and showy wings are curved and end in a carnelian solar disk, which the insect holds with its mouth and front legs. It also has two hind legs, less conspicuous than the front legs, and the middle legs were sacrificed in pursuit of the work’s elegance (remember, this beetle has six legs and not four).
Despite the chromatic richness that it presents, it is the blue of the lapis lazuli (which is also exhibited in the wings) that prevails and dominates the whole set.
However, the huge orange solar disk that stands out by itself is very striking, and the curved wings work decisively so that we pay attention to them without forgetting the striking and wide gold border where it is embedded.
The back of the beetle is completely gold and presents a wide ring at the top, so that it can be hung with a cord and worn on the chest, probably at the level of the heart.
Finally, we must remember that the dung beetle was a very popular symbol among the ancient Egyptians—it was considered one of the most important protective amulets available.
These amulets have been found made in a multitude of materials of more and less value. People bought what they could afford. Undoubtedly, those made of lapis lazuli were the most valuable, worthy of the pharaohs themselves, which was like saying it was of the gods.
Winged Scarab of Tutankhamun. Photo by: Amigos de la Egiptología – Artem GizumReverse of the Winged Scarab of Tutankhamun. Photo: H. STIERLINWinged Scarab of Tutankhamun. photo: Amigos de la Egiptología – Josep Maria Vales
KV9 is an Egyptian tomb in the so-called Valley of the Kings, located on the west bank of the Nile, at the height of the modern city of Luxor. It is one of the few tombs in the valley that was used by two pharaohs: Ramses V and Ramses VI, both belonging to the mid- 20th dynasty.
Ramses V and Ramses VI
The fourth king of the 20th dynasty, crowned with the name Usermaatre Sekheperenre Ramesses V, and usually known as Ramses V, is little known, and in his barely four years of reign (from 1147 to 1143 BC. , roughly) did not do anything worthy of renown.
Those were empty years, in which Egypt drifted adrift and the situation continued to worsen. The country had long since lost its empire, and poverty coupled with droughts and famine were destroying the place. The division of the country and the lack of will of the pharaohs only made things worse.
When Ramses V joined the list of deceased kings, without pain or glory, he was succeeded by his uncle, one of the youngest sons of the great Ramses III. Called Ramesses VI Nebmaatre-Meryamun, the new Ramses VI ruled seven more years, in which he played the same null role as his predecessor on the throne.
However, the determination of this pharaoh to declare his origin and to supplant the previous kings in numerous monuments is surprising. He would even usurp the tomb originally destined for Ramses V, as can be seen in this article.
KV9 or the tomb of Ramses VI
KV9 is located in a privileged place, very close to the central part of the Valley of the Kings, in a place where the rock is excellent and the density of tombs increases.
It is even practically on the same vertical as the famous KV62 , the tomb of Tutankhamun. Its entrance is immediately north of that of KV10 and is arranged almost parallel to, but further south, KV9 is located in a privileged place, very close to the central part of the Valley of the Kings, in a place where the rock is excellent and the density of tombs increases.
It is even practically on the same vertical as the famous KV62 , the tomb of Tutankhamun. Its entrance is immediately north of that of KV10 and is arranged almost parallel to, but further south, than KV8.
The design of the tomb is very complete, and it is one of the last tombs in the Valley completely finished, and also with an excellent result.
The profile of the place is very simple, with a total absence of attached chambers and the straight axis that all the tombs after the reign of Ramses II present.
The set is that of a tomb without great architectural pretensions, which could be finished without great problems thanks to the fact that it was started by the previous pharaoh, without great haste.
KV9 or the tomb of Ramses VI: Decoration
The tomb of Ramses VI can boast of being one of the best preserved within the Valley of the Kings. Despite having suffered some flood, the state of its paintings is good, and the frescoes and the structure of the place itself have not been seriously damaged.
The decorative program is somewhat different from that used by previous kings and includes for the first time the latest New Kingdom funerary text on its walls: the Book of Earth.
In addition, there is a particular preponderance of the god Ra against the one who usually monopolizes more scenes on these occasions, Osiris.
Excavation
Of all the tombs of the Valley opened in ancient times, KV9 is clearly the most visited and the one that aroused the greatest interest among travelers, coming to be baptized as the “Tomb of Memnon”, believing that the legendary king son of the goddess Eos.
Thus, it is not surprising that no very arduous excavation has been carried out, since the site was practically clear. However, we know that in 1888 Georges Daressy worked in the place and found some small fragments of the grave goods, vessels or coins belonging to the Greco-Roman tourists.
As mentioned above, the tomb is in an enviable state of preservation, with only a few flood damage down to the pillar chamber, and the paintings have not been lost as much as in other tombs.
Upon entering the burial chamber, one could see the outer red granite sarcophagus belonging to Ramses VI, and inside another one made of green conglomerate, whose mask is now exhibited in the British Museum in London. There is no trace of the burial of Ramses V.
The royal mummies
The first question – and perhaps the most obvious – is to know who or who were the definitive occupants of KV9.
Although it is true that the tomb was built and partially decorated by and for Ramses V, death surprised him before seeing the work done, and Ramses VI took advantage of the situation and appropriated the place. Now, was he buried alone or with his predecessor?
There are no remains that indicate the presence of Ramses V in KV9, nor does it seem that there was space for two large sarcophagi, which could indicate that the pharaoh was buried in another place yet to be determined and that Ramses VI would occupy the tomb at ease, which was not originally intended for him.
The limited knowledge we have of their reigns makes it impossible to know for sure if there were family disputes that caused Ramses VI to annul the memory of his predecessor or was simply an opportunist.
It is unlikely that the memory of Ramses V was haunted, since there is still some representation of him in the tomb itself.
Be that as it may, and thanks to the foresight of the priest-kings of the Twenty-first Dynasty, the mummies of Ramses V and VI have survived until today, both found in the hiding place of KV35, the tomb of Amenhotep II.
While the mummy of Ramses V is in an enviable state of preservation, the latter has seemed to suffer greatly at the hands of thieves and during its transfer.
The study of the mummy of Ramses V certifies that the pharaoh died around the age of thirty-five. The analysis of the skin (with the naked eye the numerous vesicles on the face, neck and arms, which are its usual marks), indicates that he died of smallpox, being the first documented case of this disease.
As if this were not enough, the pharaoh suffered from an inguinal hernia and what is worse, a hole has been found in his head that seems to have been made shortly before he died.
A murder or a trepanation to ease the pain of the unfortunate king? Nothing is clear, but carefully analyzing the mummy, up to three possible causes of his death can be found.
As for Ramses VI, his body is much more punished. The right forearm and wrist are torn. Hip bones were found at neck level and, as if this disorder were not enough, an arm of Seti II and the hand of a woman were also found among the bandages.
To be sure, the hasty priests, in their task of wrapping the mummies, did not realize that one of them was taking part of their select neighbors.
At the time of his death, the deceased appeared to be around forty to fifty years old, but the mummy does not leave too clear data on the cause of death. A hole has also been found in the skull of Ramses VI, but this was made post-mortem by thieves in search of valuable amulets.
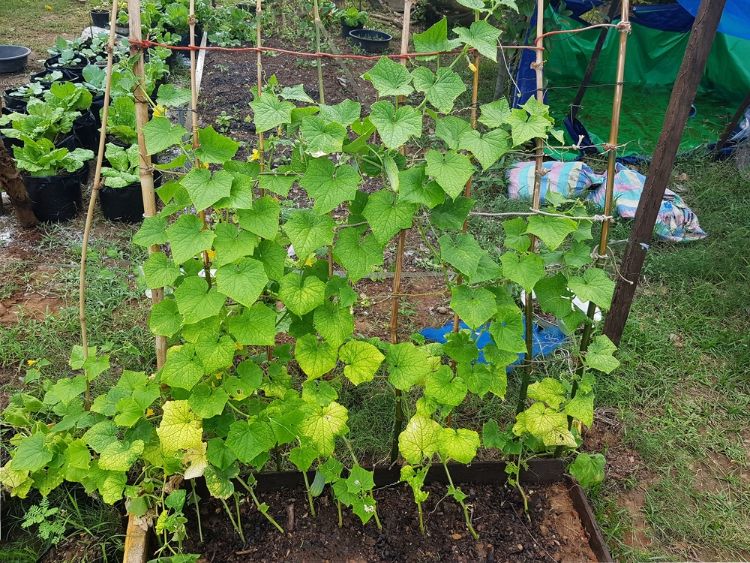
Who doesn’t love a cucumber? The delightfully fresh, crunchy produce always makes a welcome addition to salads, cheeseboards, and crudites. But what tastes even better than a cucumber is undeniably a cucumber you’ve grown yourself, at home. It’s actually surprisingly easy to get a cucumber plant going in your garden, but there are certain tips and tricks which can help you along the way.
One way to ensure you get the very best out of your cucumber plant is by making sure you’re giving it adequate support. Growing cucumbers vertically can save space in your garden, but the heavy produce the plant bears means they can’t stand alone. Luckily, there is a wide range of different ways you can create homemade trellises to add extra stability to your cucumber plants.
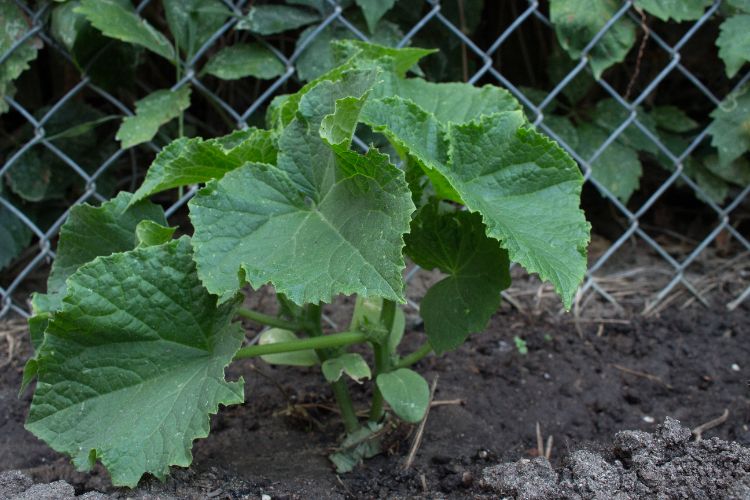
1. A fence
If your garden already has a fence, you can use it to add support to your cucumber plant. Any type of fence, be it chain-linked or wooden, can work as a backbone for your cucumber growing – plus, the attractive plants can help conceal any less attractive fencing areas.
2. A wall trellis
Some gardens are surrounded by brick walls rather than fences, and if that’s the case, you can create your own supports against your garden walls. You can use hooks or screws to affix a wooden trellis to your wall or create a more natural structure using bamboo or other strong, sturdy sticks.
3. A vertical trellis
To make the most of limited bed space, you can install a vertical trellis right down the middle, acting almost like an extra layer of fence! You can use a readymade trellis, or create your own from natural or reclaimed materials then dig down into your beds and place the trellis to install.
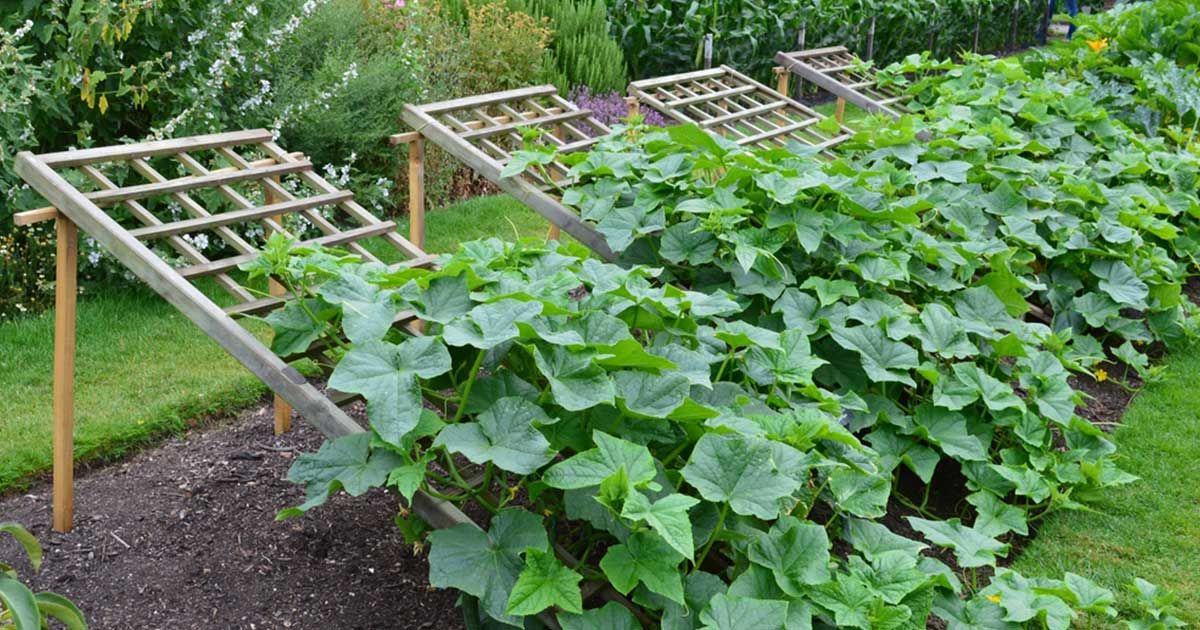
4. A tent trellis
Another way to create support over existing beds is the tent trellis. This is a structure using two trellis sides joined together at the top in a triangular shape. This offers a surprising amount of strength to the structure to help hold up heavy cucumbers.
5. A reclaimed trellis
If you don’t want to buy or make a trellis structure to support your cucumbers, you can use some readymade items instead. An old stepladder or wooden pallet can work really well to hold your plants up – simply lean them against a wall.
6. A teepee trellis
For just one cucumber plant, a singular teepee-shaped trellis could be the best option. You can quickly build this structure using several strong sticks, tied together to the top, then place it over your cucumber plant and watch it grow and thrive.
7. An arch trellis
Arch trellises are a really good option if you want to keep your cucumber trellis lower to the ground. These types of trellises are best made out of wire but can be customized easily to be as big, small, long, or short as you’d like.
8. A twine trellis
This quick and easy option is perfect for adding support to cucumber plants in a pinch. You can simply tie lengths of yarn, string, or twine above your cucumber plants, creating a surprisingly strong network for them to grow on.
9. No trellis!
If you have the garden space, it isn’t actually necessary to add vertical support to your cucumber plants at all. You can simply allow your plants to stay close to the ground, with the soil offering all the support your final cucumbers need.
Planting vegetables at the right time is crucial for a successful harvest. Knowing the best times to plant will ensure that your plants have optimal growing conditions, leading to healthy and productive growth. Understanding the climate, soil conditions, and individual growing requirements of each vegetable will help you make informed decisions on when to plant and how to care for your plants.
By planting at the right time, you can also extend your growing season, allowing you to enjoy fresh, home-grown produce for longer. In addition, planting at the right time can help prevent problems such as disease and insect infestations, which can greatly affect the health and yield of your plants. With the right information and a little planning, you can have a productive and successful vegetable garden.
Tomatoes
Best planted in late spring (May to June) to early summer (June to July), after the last frost date. They need warm soil and sunny conditions to grow. Harvest when the tomatoes are fully ripe and have reached their desired size, usually in late summer (August to September) or early fall.
Onions
Onions are a versatile and widely used vegetable that can be grown in various regions. They are typically planted in early spring (March to April) or late summer (August to September) and prefer well-drained soil and full sun. Onions form bulbs underground, and their green tops, known as scallions or green onions, can be harvested at any stage of growth. For mature onions, they are ready to be harvested when the tops start to yellow and fall over. This usually occurs in late summer (August to September) or early fall. Once harvested, onions should be cured by drying them in a warm, dry, and well-ventilated area to promote storage and improve their flavor. Onions are a staple ingredient in numerous cuisines and add flavor and depth to a wide range of dishes, making them an essential vegetable for both culinary enthusiasts and professional chefs.
Peppers
Also best planted in late spring (May to June) to early summer (June to July), after the last frost date. Peppers also need warm soil and full sun. Harvest when the peppers have turned their mature color and have reached the desired size, usually in late summer (August to September) or early fall.
Squash
Summer squash, such as zucchini, are best planted in late spring (May to June) to early summer (June to July). Winter squash, such as pumpkin, can be planted in late summer (July to August) for a fall harvest. Harvest summer squash when they are still young and tender, usually in mid to late summer (July to August). Harvest winter squash when the skin has hardened and can’t be easily punctured with a fingernail, usually in late fall (September to October).
Carrots
Carrots can be planted in early spring (March to April) or late summer (August to September), when the soil is cool. They grow best in well-drained soil and full sun. Harvest carrots when they have reached the desired size and color, usually around 60 to 80 days after planting, depending on the variety. For spring-planted carrots, harvest in late spring to early summer (May to June), and for late summer-planted carrots, harvest in late fall (October to November) or early winter.
Broccoli
Broccoli is a cool-season crop and can be planted in early spring (March to April) or late summer (August to September). It grows best in moderate temperatures and partial shade. Harvest broccoli when the heads are firm and compact, but before the yellow flowers open. This is usually around 60 to 80 days after planting. For spring-planted broccoli, harvest in late spring to early summer (May to June), and for late summer-planted broccoli, harvest in late fall (October to November) or early winter.
Cucumbers
Cucumbers are a warm-season crop and can be planted in late spring (May to June), after the last frost date. They need full sun and well-drained soil to grow. Harvest cucumbers when they have reached the desired size and are still firm and green. This is usually around 50 to 70 days after planting, depending on the variety. Harvest throughout the summer (June to August) until the vines start to decline.
Lettuce
Lettuce can be planted in early spring (March to April) or fall (September to October), when the soil is cool. It grows best in moderate temperatures and partial shade. Harvest lettuce when the leaves are large enough to use, but before they become bitter or start to bolt. This is usually around 30 to 70 days after planting, depending on the variety. For spring-planted lettuce, harvest in late spring to early summer (May to June), and for fall-planted lettuce, harvest in late fall (October to November) or early winter.
Beans
Beans are a warm-season crop and can be planted in late spring (May to June), after the last frost date. They need full sun and well-drained soil to grow. Harvest green beans when the pods are young, tender, and before the seeds inside have fully developed. This is usually around 50 to 60 days after planting. Harvest throughout the summer (July to August) until the plants stop producing.
Radishes
Radishes are a cool-season crop and can be planted in early spring (March to April) or late summer (August to September). They grow best in cool soil and full sun. Harvest radishes when the roots have reached the desired size and are firm and crisp. This is usually around 20 to 30 days after planting. For spring-planted radishes, harvest in late spring to early summer (May to June), and for late summer-planted radishes, harvest in late summer (September to October) or early fall.
Beets
Beets can be planted in early spring (March to April) or late summer (August to September), when the soil is cool. They grow best in well-drained soil and full sun. Harvest beets when the roots have reached the desired size and are firm and tender. This is usually around 50 to 70 days after planting. For spring-planted beets, harvest in late spring to early summer (May to June), and for late summer-planted beets, harvest in late fall (October to November) or early winter.
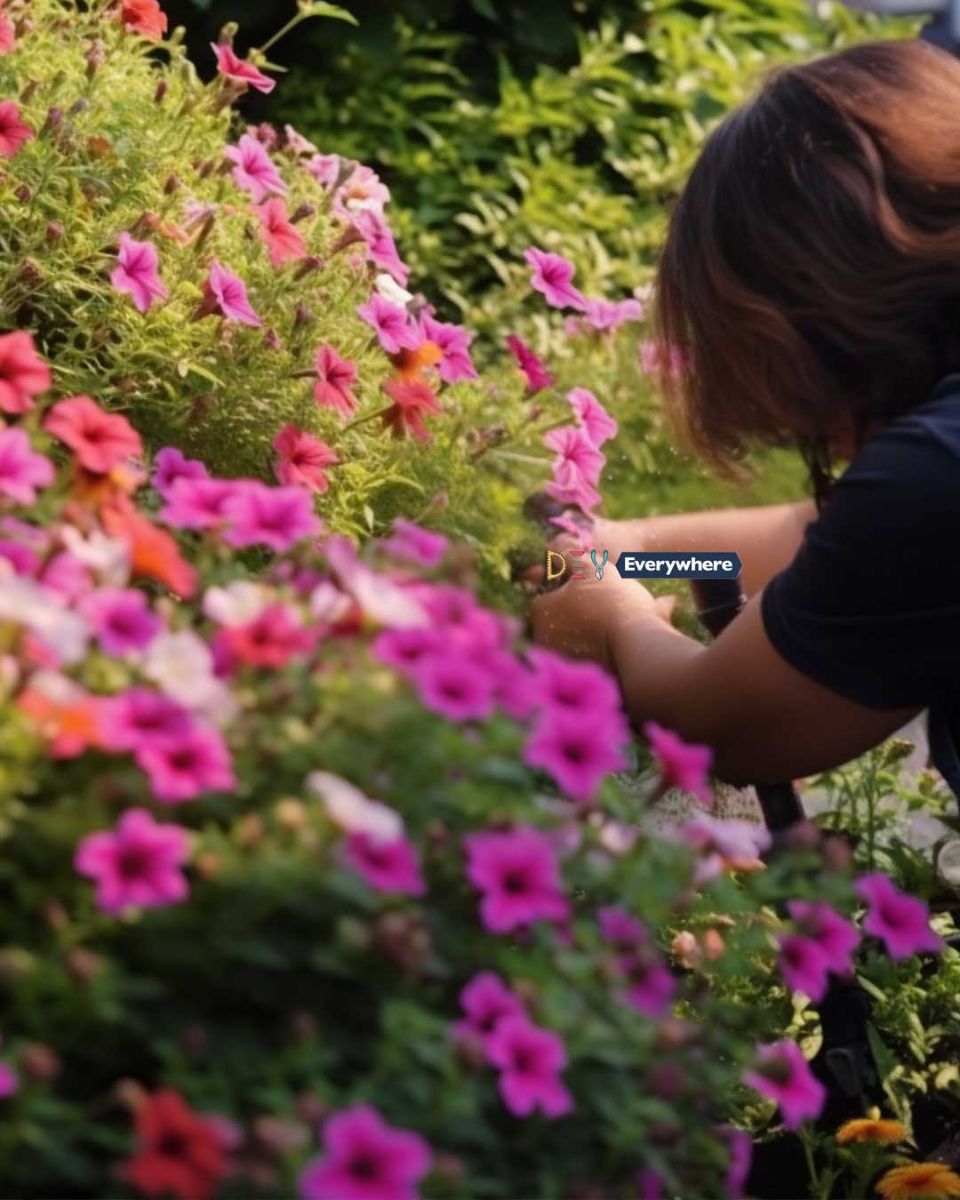
Annual plants undergo a remarkable journey within a single growing season, progressing from seed germination to their ultimate demise. Although some gardeners may find the annual cycle of planting and replanting each spring a bit demanding, there are numerous advantages to incorporating annuals into your landscape. These include a wider spectrum of vibrant colors, cost-effectiveness compared to perennial plants, the convenience of not having to divide plants over time, and the ability to easily swap them out for different varieties.
Despite their relatively short life spans, annuals can maintain a consistent display of beautiful blossoms throughout much of their existence if properly tended to. Here are some detailed tips to help you achieve this:
Deadhead Spent Flowers:
Removing fading or spent flowers serves a critical purpose. Plants invest energy in producing blooms, and when these flowers start to decline, the plant shifts its focus to seed production. By consistently deadheading, you redirect the plant’s energy towards generating new blossoms instead of seeds, resulting in a prolonged and more abundant flowering period.
Pinch Back Leggy Plants:
When annual plants grow excessively tall and thin, it is primarily due to a phenomenon known as etiolation. This happens when the plant stretches for light. By pinching back the top portions of leggy plants, you encourage them to allocate resources towards lateral growth. This lateral growth creates a denser, more attractive appearance and ensures that the plant remains sturdy and less prone to toppling over.
Trim Lateral Buds off Stems:
In cases where you desire a single, large flower on a stem, it’s crucial to remove lateral buds. These buds compete for nutrients and can result in smaller, less impressive blooms. By eliminating these lateral buds, you concentrate the plant’s resources on nurturing one dominant flower, leading to a more striking and substantial blossom.
Remove Terminal Buds:
Removing the terminal bud, which is the bud at the very tip of a stem, has a fascinating effect. When the terminal bud is taken off, the plant responds by channeling energy into the growth of lateral buds below it. This creates multiple smaller buds along the stem, ultimately producing a profusion of blooms, adding vibrant color and visual interest to your garden.
Discard Diseased Tissue:
Plant diseases and fungal issues can spread rapidly if not addressed promptly. Removing infected or diseased tissue is vital to prevent the ailment from spreading to healthy parts of the plant or to neighboring plants. This practice not only safeguards the affected plant but also helps maintain the overall health of your garden.
Use Clean, Sharp Equipment:
Clean, well-maintained gardening tools are essential for two critical reasons. First, clean tools prevent the inadvertent transfer of diseases from one plant to another. Pathogens can cling to dirty equipment, and using contaminated tools can inadvertently spread diseases throughout your garden. Second, sharp tools make clean, precise cuts during pruning. This minimizes damage to plant tissue, reduces stress on the plant, and accelerates the healing process, ultimately leading to healthier and more vigorous growth.