Categories
Plant Tips

8 ways to use peppermint around the house

We all love the fresh, relaxing scent of peppermint. While you may be familiar with using peppermint to make tea or add a burst of flavor to couscous salad, you may be surprised to learn there are many ways to use peppermint around the house. Continue reading to learn our 8 favorite household uses.
1. Mouse deterrent. Peppermint is a fabulous organic, all-natural mouse deterrent, according to BulkHerbsStore. You can plant the herb around the perimeter of your house, fill socks with dried peppermint and stick them in trouble spots. Or, make a big pot of peppermint tea and use the liquid to clean your home. Each of these methods should keep rodents away.
2. Pest control. eHow recommends filling a spray bottle with warm water treated with 1 tablespoon pure peppermint oil. Generously spray windowsills, doorways, screens and basement levels to prevent pests from entering the home. Repeat once a month and after rainfall for best results.
3. Disinfectant. When mixed with tea tree oil, peppermint oil can be a wonderful disinfectant, says Little House Living. Use the solution on oft-touched surfaces like doorknobs and faucets to keep germs at bay.
4. Kill fleas. If your dog is suffering from fleas, spray your furry friend with a mixture of peppermint oil and epsom salts dissolved in warm water, as suggested by Little House Living.
5. Mask odors. If your garbage tends to get smelly, add a few drops of peppermint oil to the bottom of the bin to mask the odor, recommends Sublime Beauty Naturals.
6. All purpose cleaner. The natural anti-fungal and antibacterial properties of peppermint make it an excellent addition to the organic method of cleaning with water and vinegar, says Sublime Beauty Naturals.
7. Air freshener. Peppermint has long been used in aromatherapy. Natural Living Ideas recommends misting the air with a mixture made from 8 ounces of water with 4 drops peppermint oil, 4 drops wild orange oil, and 1 tablespoon vanilla extract. You can play with mixing and matching peppermint oil with different essential oils to find a custom scent you love.
8. Wood cleaner. Natural Living Ideas suggests mixing 6 ounces olive oil with 2 ounces white distilled vinegar, 10- 20 drops peppermint oil and 10- 20 drops citrus oil in a glass spray bottle. Shake well, spray directly on wood surfaces and buff with a clean, dry cloth.
How have these peppermint home remedies for use around the house helped you? Tell us your stories when you SHARE this article on social media!
Categories
Plant Tips

This dollar store flower decorating technique is going viral (7+ projects)

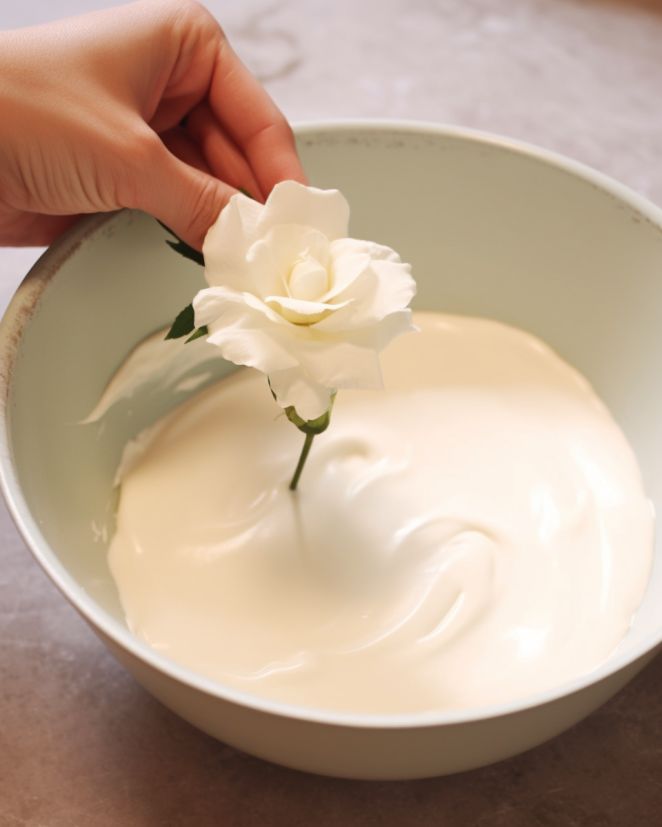
Plaster of Paris is an easy-to-use hardening agent. It’s commonly used in projects like paper-mache and ornamental decorations. One trend that’s blowing up Pinterest is using this plaster to coat flowers and create beautiful decorative floral pieces.
Plastering the flowers is as simple as mixing the plaster, gently coating the flowers and allowing them to dry. The result is surprisingly stunning. Check out how these crafters have taken the trend to the next level.
1. Plaster of Paris jars
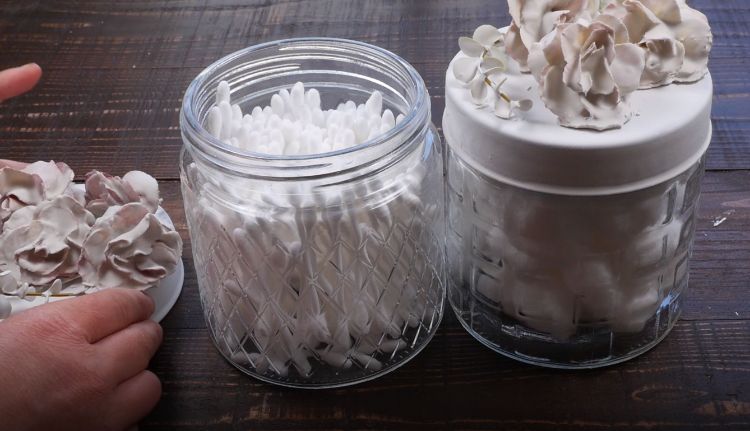
Add a little pop to your bathroom storage solutions by attaching smaller plaster flowers to the lids of glass jars. Fill the jars with cotton balls or other essentials, and pop the cute lid on top. Feeling more decorative? Fill the jars with colored sand, shells or marbles.
2. Plaster flower candle votive
This stunning project gives you elegant decor that’s pretty and functional. You can even add tint to make the flowers a color that matches your home.
3. Plaster of Paris flower hanging votive
This is a fun twist on the plaster-of-Paris flower trend. Once the flowers have hardened completely, attach the flowers and a small candle to a painted board for a pretty wall decoration.
4. Plaster-dipped flowerpot
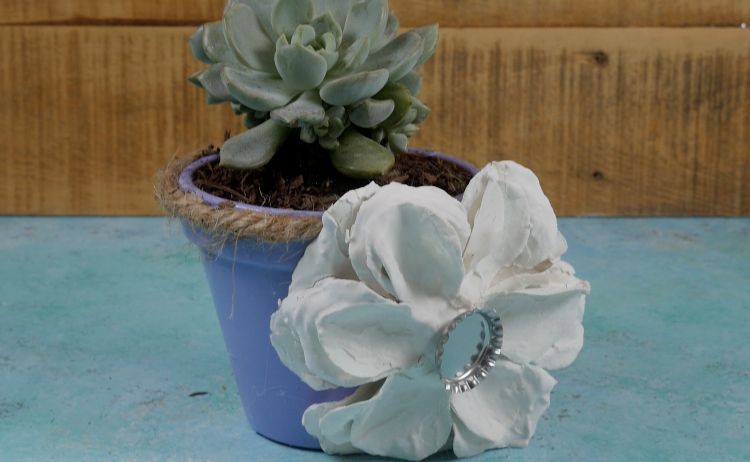
Give your herbs and spices a makeover with this adorable flower pot idea. After using plaster to coat your flowers, you can attach it to a pot to dress up your favorite plant. Have fun with these by painting the petals or adding jewels or extra pop.
5. Plaster flower picture
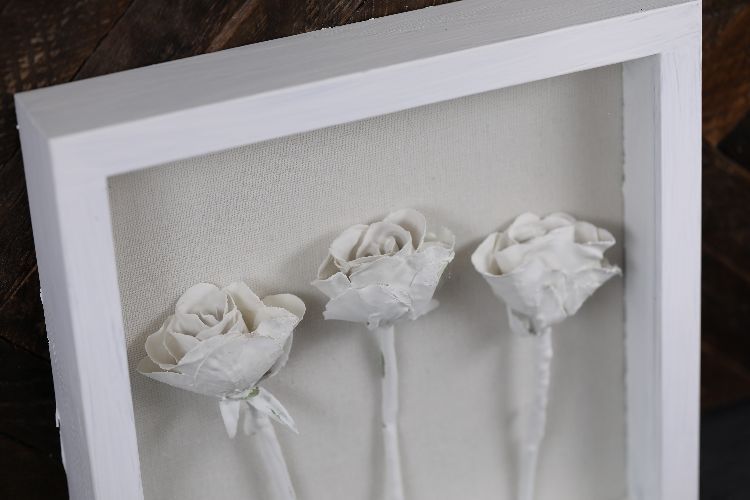
Try a more traditional project for your plaster flowers. Choose a frame that’s the same color as the plaster (white if you don’t add tint), add plastered flowers, and hang it on your wall. Use different flowers in each frame for a modern design pop.
6. Pretty plaster garbage can
There’s no need to throw your trash in an ugly bin! Make it pretty by attaching plaster flowers to a wire garbage can. Note: The flowers are heavier in plaster, so you might want to try smaller flowers first. Check out the cute results below: (If you want to be super matchy matchy, we recommend a white wire basket.)
7. Plaster rose sculpture
This project featured below is decidedly elegant! It looks stunning in all white (no tint needed), but you could go a little artsy and tint just a few of the flowers (or all of them).
Categories
Plant Tips

Stop throwing out banana peels. Here are 8 effective ways to use them in the garden

You know all those banana peels you’ve been throwing away? Well, there are actually some useful ways to reuse those soft shells — and no, we don’t mean for tripping your friends cartoon-style.
If you live in a banana-eating household, you probably throw close to a dozen of these away every couple of weeks. Stop the waste and start using these peels to help boost your garden’s health and nutrients. It’s easy, free and something you do year-round — whether it’s for your veggie garden or house plants.
1. Banana peel tea
No, you’re not going to drink this stuff. Instead, you’re going to stick a peel in a jar full of water for two days, and then pour it over your plants. The nutrients from this tea invigorate your plants and give them an added boost.
2. Plant them directly in your garden
Use fresh peels or even the peels from your banana peel tea above for this one. Simply cut up the peel into 1/4-inch pieces and place them either below your plants before you plant them (be sure to stick them far enough down so they don’t get in the way of the roots), or just below the surface.
By cutting up the peel, you start the decomposing process — and as this plant decays, it is going to release some awesome vitamins and nutrients for your new plants.
3. Toss banana peels in the compost
People don’t like to throw out food. Banana peels often spark the idea for a compost pile. Start with your banana peels, and then begin adding all your other scraps to create some super-rich compost.
4. Dry and ground up for fertilizer
Dry out your peels, ground them up and sprinkle this nutrient-rich powder on soil before planting for an added boost of power. The Frugal Chicken has a great tutorial on drying out peels.
5. Simply plant the whole peel
This is probably the most obvious option, and it works well. Dig a trench 4 or more inches deep. Lay your peel out flat, fill it up a bit with dirt and plant your seeds. As your plant’s roots grow and the peel decomposes, the roots will get access to some wonderful nourishment.
6. Fertilizer spray
It’s pretty much a banana peel spray, but with an added kick. Mix up crushed eggshells for a calcium boost and Epsom salt for magnesium in a spray bottle. Use it to give your well-established garden and house plants a vitamin boost.
7. Insect trap
Want to keep pesky bugs out of your garden or off your patio? Soak a cut-up banana peel with apple cider vinegar and place it in a plastic container with holes on top just big enough to let a bug inside. The smell will draw them in and the solution will trap them. It’s a great nontoxic option for both your garden and pets.
8. Banana vinegar
You won’t want to drink it, but your acidic soil-loving plants like blueberries are going to crave this stuff.
The Frugal Chicken explains that you should ferment your bananas in water (full instructions here), and then use the water from the fermenting process on your plants. Let the fermented water sit for four to six weeks so it creates its own vinegar. It’ll give your acid-loving plants a great boost.
Want to know something else? Banana peels are good for around the house too! A few awesome tips from Trash Backwards are:
– Use banana peel to heal a wart; can take just one to two weeks
– Rub the inside of a banana peel on your teeth to whiten them
– Rub the inside of a banana peel on shoes as a shoe polish
– Use the inside of a peel to help heal a bruise
– Banana peels can help heal acne if you rub them on a spot
Did you find this article helpful? Don’t forget to share it with your friends on Facebook, Twitter and Pinterest!
Categories
Plant Tips

Get the biggest blooms on your petunias with this step-by-step guide

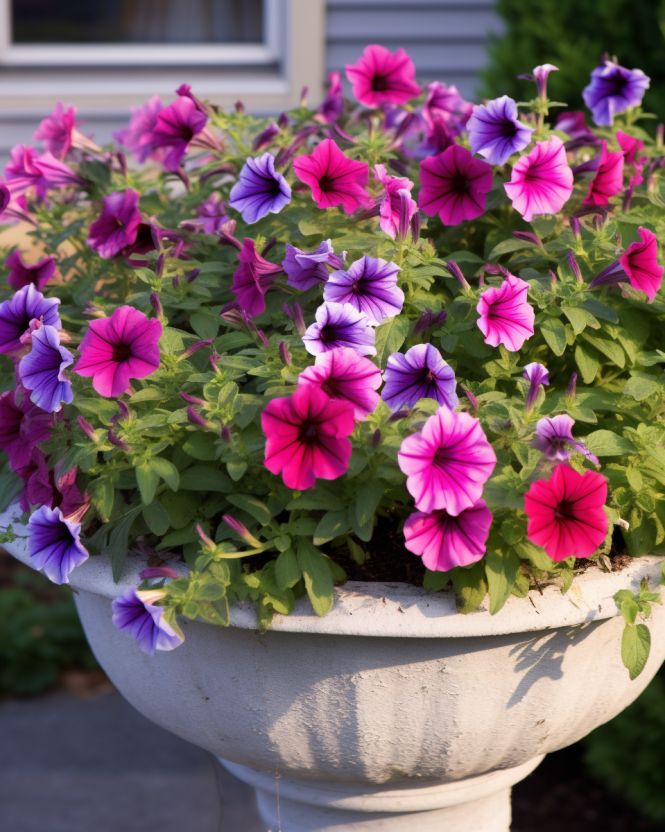
Petunias, with their vibrant colors and prolific blooms, have become a cherished choice among gardeners looking to add a splash of beauty to their outdoor spaces. These popular flowering plants, native to South America, belong to the Solanaceae family and are known for their trumpet-shaped flowers that come in a wide range of hues, including pink, purple, red, white, and multicolor combinations. With their versatility and stunning display, it’s no wonder why gardeners often opt for petunias over other plants to adorn their gardens, hanging baskets, and planters.
Gardeners are drawn to petunias for several reasons. First and foremost, these flowering plants are known for their prolific blooming habit. Petunias produce an abundance of flowers throughout the growing season, providing a continuous burst of color from spring to fall. Their ability to produce large blooms in a variety of colors makes them an ideal choice for creating eye-catching floral displays. Additionally, petunias are relatively easy to grow, making them suitable for gardeners of all skill levels. They are adaptable to different growing conditions, including containers, hanging baskets, borders, and flower beds, allowing for creative and flexible design possibilities. With their remarkable beauty and versatility, it’s no wonder that petunias are a popular choice among gardeners looking to create stunning floral landscapes.
Here’s a step-by-step guide on how to get the biggest blooms on petunias in a planter:
1. Choose the right variety:
Look for petunia varieties that are specifically bred for larger blooms. Some popular choices include grandiflora petunias or cascading varieties like Surfinia or Wave petunias.
2. Select a suitable planter:
Choose a planter with good drainage holes to prevent waterlogging and ensure proper drainage. The size of the planter should be appropriate for the number of petunias you want to plant.
3. Use high-quality potting soil:
Fill the planter with a well-draining potting soil that is rich in organic matter. Avoid using garden soil, as it can be too heavy and may not provide the necessary drainage.
4. Start with healthy seedlings or young plants:
Purchase healthy and vigorous petunia seedlings or young plants from a reputable nursery or garden center. Look for plants with vibrant green foliage and no signs of pests or diseases.
5. Plant the petunias:
Dig small holes in the potting soil, spaced according to the recommended spacing for the variety you’ve chosen. Carefully remove the petunias from their containers and place them in the holes. Gently firm the soil around the roots.
6. Provide adequate sunlight:
Petunias thrive in full sun, so place the planter in a location that receives at least 6-8 hours of direct sunlight every day. Insufficient sunlight can lead to weak growth and fewer blooms.
7. Water regularly:
Keep the soil consistently moist but not waterlogged. Water the petunias thoroughly whenever the top inch of soil feels dry to the touch. Avoid overwatering, as it can cause root rot and other problems.
8. Fertilize regularly:
Petunias are heavy feeders, so it’s important to provide them with regular nutrients. Use a balanced, water-soluble fertilizer formulated for flowering plants. Follow the package instructions for application rates and frequency.
9. Pinch and prune:
To encourage bushier growth and more blooms, pinch back the tips of the petunia plants when they reach about 4-6 inches in height. This will promote branching and result in a fuller, more compact plant.
10. Deadhead spent blooms:
Remove faded or wilted flowers regularly by pinching or cutting them off. Deadheading prevents the plants from expending energy on seed production and encourages the development of new blooms.
11. Monitor for pests and diseases:
Keep an eye out for common pests like aphids, slugs, and snails. If you notice any signs of infestation or disease, take appropriate measures to control them, such as using insecticidal soap or organic pest control methods.
12. Maintain proper airflow:
Good air circulation is important for preventing fungal diseases. Avoid overcrowding the petunias in the planter, as it can lead to poor airflow. If necessary, thin out the plants or provide additional spacing.
13. Consider supplemental feeding:
If you want to boost the bloom production further, you can use a bloom booster fertilizer or apply a phosphorus-rich fertilizer during the flowering season. Follow the package instructions for application guidelines.
Categories
Plant Tips

Get a big harvest: 9 cucumber trellis and support ideas

Who doesn’t love a cucumber? The delightfully fresh, crunchy produce always makes a welcome addition to salads, cheeseboards, and crudites. But what tastes even better than a cucumber is undeniably a cucumber you’ve grown yourself, at home. It’s actually surprisingly easy to get a cucumber plant going in your garden, but there are certain tips and tricks which can help you along the way.
One way to ensure you get the very best out of your cucumber plant is by making sure you’re giving it adequate support. Growing cucumbers vertically can save space in your garden, but the heavy produce the plant bears means they can’t stand alone. Luckily, there is a wide range of different ways you can create homemade trellises to add extra stability to your cucumber plants.
1. A fence
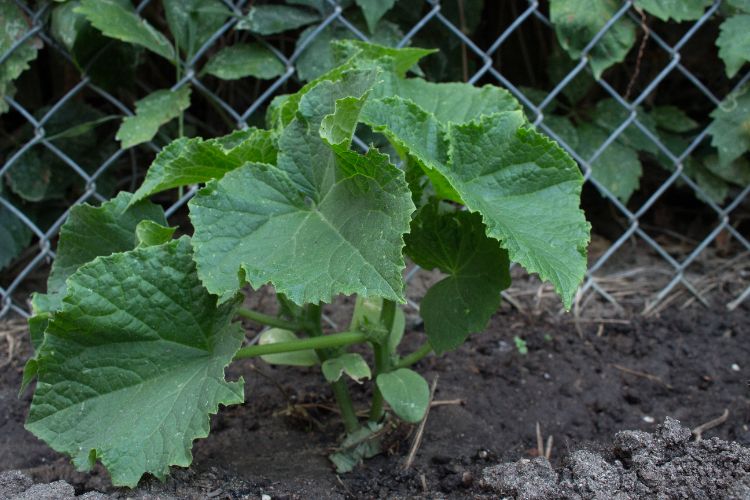
If your garden already has a fence, you can use it to add support to your cucumber plant. Any type of fence, be it chain-linked or wooden, can work as a backbone for your cucumber growing – plus, the attractive plants can help conceal any less attractive fencing areas.
2. A wall trellis
Some gardens are surrounded by brick walls rather than fences, and if that’s the case, you can create your own supports against your garden walls. You can use hooks or screws to affix a wooden trellis to your wall or create a more natural structure using bamboo or other strong, sturdy sticks.
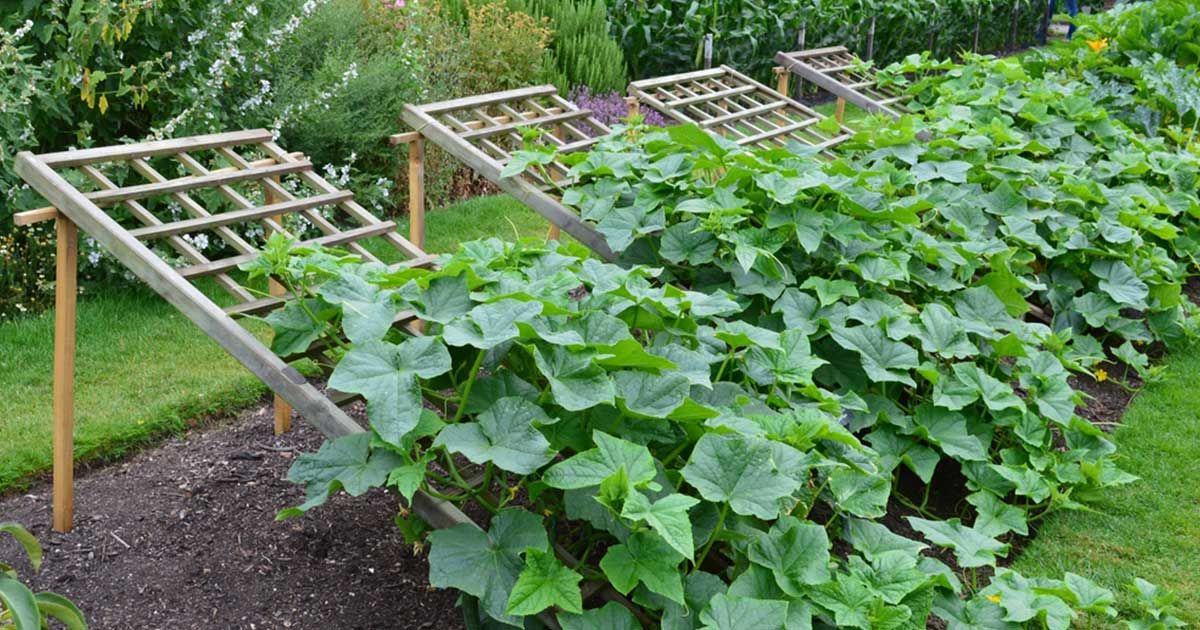
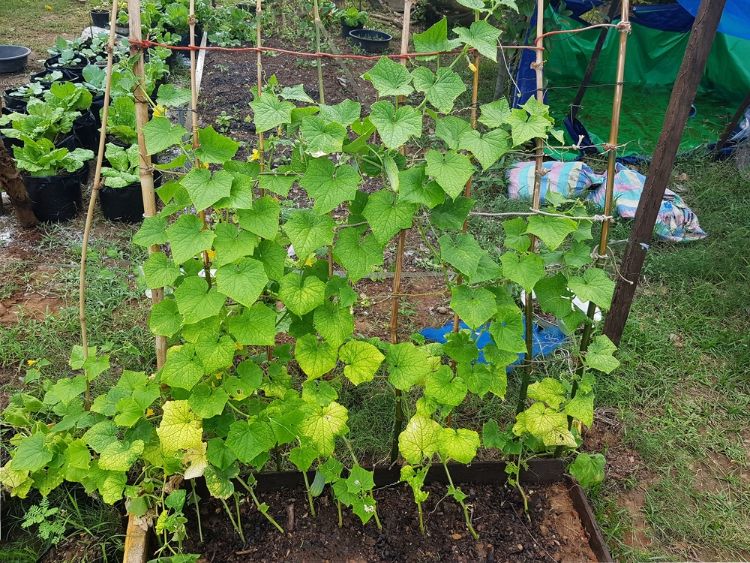
3. A vertical trellis
To make the most of limited bed space, you can install a vertical trellis right down the middle, acting almost like an extra layer of fence! You can use a readymade trellis, or create your own from natural or reclaimed materials then dig down into your beds and place the trellis to install.
4. A tent trellis
Another way to create support over existing beds is the tent trellis. This is a structure using two trellis sides joined together at the top in a triangular shape. This offers a surprising amount of strength to the structure to help hold up heavy cucumbers.
5. A reclaimed trellis
If you don’t want to buy or make a trellis structure to support your cucumbers, you can use some readymade items instead. An old stepladder or wooden pallet can work really well to hold your plants up – simply lean them against a wall.
6. A teepee trellis
For just one cucumber plant, a singular teepee-shaped trellis could be the best option. You can quickly build this structure using several strong sticks, tied together to the top, then place it over your cucumber plant and watch it grow and thrive.
7. An arch trellis
Arch trellises are a really good option if you want to keep your cucumber trellis lower to the ground. These types of trellises are best made out of wire but can be customized easily to be as big, small, long, or short as you’d like.
8. A twine trellis
This quick and easy option is perfect for adding support to cucumber plants in a pinch. You can simply tie lengths of yarn, string, or twine above your cucumber plants, creating a surprisingly strong network for them to grow on.
9. No trellis!
If you have the garden space, it isn’t actually necessary to add vertical support to your cucumber plants at all. You can simply allow your plants to stay close to the ground, with the soil offering all the support your final cucumbers need.
Categories
Plant Tips

18 herbs you can grow in just water all year round


Growing herbs in water is a fantastic way to bring the joys of gardening into your living space, even if you lack a traditional garden. Not only do these herbs offer delightful flavors and aromas to your culinary adventures, but they also bring a touch of nature indoors.
If you’ve ever dreamed of having a flourishing herb garden but lack outdoor space or a green thumb, growing herbs in water might just be the perfect solution for you. Not only is it a convenient way to enjoy fresh herbs year-round, but it also adds a touch of natural beauty to your living space. In this article, we’ll explore 18 herbs that you can easily grow in water, along with tips on how to care for them to ensure their continuous growth.
1. Basil
Benefits: Basil is not only a staple in Italian cuisine but also a rich source of vitamins and minerals. Its aromatic leaves are packed with antioxidants and have antibacterial properties.
Basil is a fragrant and flavorful herb that thrives in water. Change the water every 3-5 days, and you’ll have a steady supply of basil leaves for your culinary endeavors.
2. Mint
Benefits: Mint’s refreshing flavor isn’t the only reason to grow it. Mint is known for aiding digestion, soothing headaches, and offering a cooling sensation that can relieve minor skin irritations.
Mint is known for its rapid growth, making it an excellent choice for water propagation. Change the water every 2-3 days to keep your mint plant healthy and thriving.
3. Oregano
Benefits: Oregano is a potent herb with antimicrobial and anti-inflammatory properties. It’s also rich in antioxidants and has been used in traditional medicine to alleviate respiratory issues.
Oregano can be propagated in water and will last indefinitely with regular water changes. Every 5-7 days, provide fresh water to maintain its growth.
4. Sage
Benefits: Sage is believed to have cognitive-enhancing properties and has been used for its antimicrobial effects. Its leaves can be brewed into a soothing tea that supports digestion.
Sage adds a distinctive aroma to your home. Change the water every 1-2 weeks and ensure that the leaves are not submerged to prevent rotting.
5. Rosemary
Benefits: Rosemary not only adds a delightful aroma to your home but also contains compounds that may improve memory and concentration. It’s also a good source of antioxidants.
Rosemary can take a bit longer to root in water, but once established, it’s a hardy herb. Change the water every 2 weeks and be patient as it establishes its roots.
6. Thyme
Benefits: Thyme is known for its immune-boosting properties and has been used to relieve respiratory congestion. It’s rich in essential oils that offer both flavor and health benefits.
Thyme is a low-maintenance herb. Change the water every 1-2 weeks and trim the plant to encourage healthy growth.
7. Chives
Benefits: Chives are a versatile herb that adds a mild onion flavor to dishes. They contain vitamins A and C, as well as antioxidants that promote overall health.
Chives are easy to grow in water. Change the water every 4-5 days and watch them thrive. Snip the leaves regularly to promote growth.
8. Lemongrass
Benefits: Lemongrass has a refreshing citrusy aroma and is used to make soothing teas. It’s believed to have anti-anxiety properties and may help lower cholesterol levels.
Lemongrass can be grown in water and will develop a robust root system. Change the water every 1-2 weeks and enjoy its citrusy aroma.
9. Cilantro
Benefits: Cilantro, also known as coriander, is a detoxifying herb that may help remove heavy metals from the body. It’s a rich source of vitamins and minerals.
Cilantro can be a bit finicky, but it can grow in water. Change the water every 3-4 days and ensure it gets enough sunlight.
10. Parsley
Benefits: Parsley is more than just a garnish. It’s rich in vitamins K and C and contains antioxidants that support heart health and bone strength.
Parsley is another herb that does well in water. Change the water every 3-4 days and pinch off any flowers to encourage leaf growth.
11. Lemon Balm
Benefits: Lemon balm has a calming effect and is often used to alleviate stress and anxiety. Its leaves can be used to make soothing teas that promote relaxation.
Lemon balm can be propagated in water easily. Change the water every 1-2 weeks and enjoy its calming fragrance.
12. Stevia
Benefits: Stevia is a natural sweetener that doesn’t raise blood sugar levels. Growing your own stevia allows you to enjoy a healthier alternative to refined sugar.
Stevia can be grown in water as a natural sweetener source. Change the water every 1-2 weeks and provide bright, indirect light.
13. Marjoram
Benefits: Marjoram has a pleasant aroma and is used to flavor various dishes. It’s believed to have antioxidant and anti-inflammatory properties.
Marjoram can be rooted in water and grown indoors. Change the water every 2 weeks and pinch off the tips to encourage bushier growth.
14. Spearmint
Benefits: Spearmint is known for its digestive benefits and can help relieve symptoms like bloating and indigestion. Its leaves can also be brewed into a refreshing tea.
Spearmint is another variety of mint that grows well in water. Change the water every 2-3 days and pinch off the tips to promote branching.
15. Tarragon
Benefits: Tarragon has a distinctive flavor and contains compounds that may help regulate blood sugar levels. It’s also rich in vitamins and minerals.
Tarragon can be a bit slower to root in water but will eventually thrive. Change the water every 2 weeks and provide a warm environment.
16. Lavender
Benefits: Lavender’s calming aroma is often used to promote relaxation and improve sleep quality. Lavender tea can have soothing effects on the nervous system.
Lavender can be rooted in water and will add a lovely scent to your surroundings. Change the water every 2 weeks and give it plenty of sunlight.
17. Dill
Benefits: Dill has antibacterial properties and is often used to aid digestion. Its leaves and seeds add a unique flavor to both culinary and pickling recipes.
Dill can be grown in water and will provide you with its feathery fronds. Change the water every 3-4 days and pinch off the flowers to extend its life.
Categories
Plant Tips

9 most effective ways to kill weeds naturally

When you’ve spent hours cutting, trimming, and planting to ensure your yard looks beautiful and relaxing, the sight of weeds cropping up is enough to make you crazy. If you’re having a hard time getting rid of these pesky yard design killers, check out a few of the best ways to take them out for good.
Let us know if you’ve used any of these tactics for clearing out the unwelcome guests from your garden.
1. Use baking soda
Baking soda is a safe option that will keep weeds out of the cracks in your sidewalks and patio surfaces without introducing toxins to the environment. Simply sprinkle a few handfuls onto the sidewalk and sweep it into the cracks, according to Reader’s Digest.
2Salt ’em
Boil two parts water with one part salt. Pour the mixture directly on weeds. You can also sprinkle salt on weeds in your sidewalk and spray a bit of water on top.
.
3. Get ’em drunk
Alcohol can be dehydrating (which may explain why you’re really thirsty after downing one too many). This dehydration effect works great for snuffing out weeds. Combine 1 ounce of vodka with 2 cups of water and a little dish soap. Mix it in a spray bottle and douse weeds liberally. Hit the weeds in the middle of the day when the sun is high for the best effect.
4. Add a bit of flavor
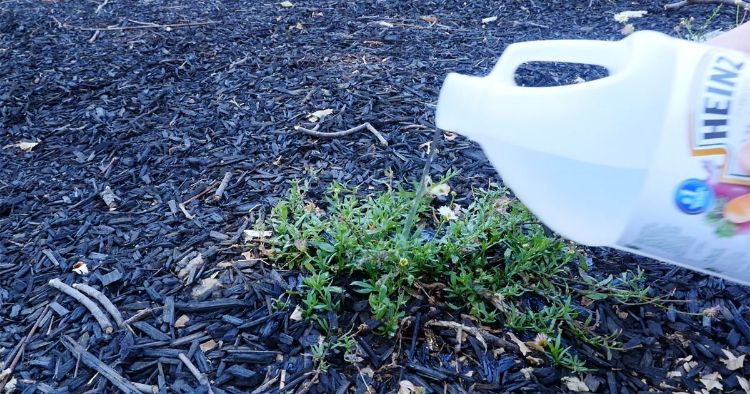
Crisp your weeds into submission by mixing 1 cup of salt with 1 gallon of vinegar, a bit of dish soap and some citrus oil. Spray the mixture on the weeds.
5. Prevent them from ever showing up
You can make it much harder for weeds to grow by spreading a bit of cornmeal. Cornmeal makes it harder for weed seeds to reproduce. It doesn’t actually kill anything, but it’s a good preventative measure.
6. Suffocate the suckers
It doesn’t sound humane, but weeds cropping up and ruining your beautiful garden get what’s coming to them. To nix weeds naturally, layer the desired area with at least four sheets of newspaper. The paper keeps sunlight from feeding pesky weeds. Weigh the newspaper down with a layer of mulch.
7. Grow your lawn
Oddly, one of the best ways to keep weeds at bay is to keep your lawn fertilized. Thick, healthy grass takes up tons of space on the ground and blocks weeds from sprouting, according to This Old House. Just be careful: Too much fertilizer (even the natural kind) can kill your grass.
8. Hand-weed
It’s not fun, but it’s effective. The best way to kill weeds and stop them from taking over your yard is to do it by hand. You’ll want to catch the weeds in their infancy. Use a sharp tool and yank the entire weed (root included). Reseed the area with grass as soon as you pull the weed to encourage grass growth and block out weeds.
9. Boiling water
It’s safe. It’s simple. It works. Just pour a pan of boiling water over a weed and watch it wither and die.